Thursday, April 14, 2011

FABULOUS SHABBY CHIC ANTIQUE!

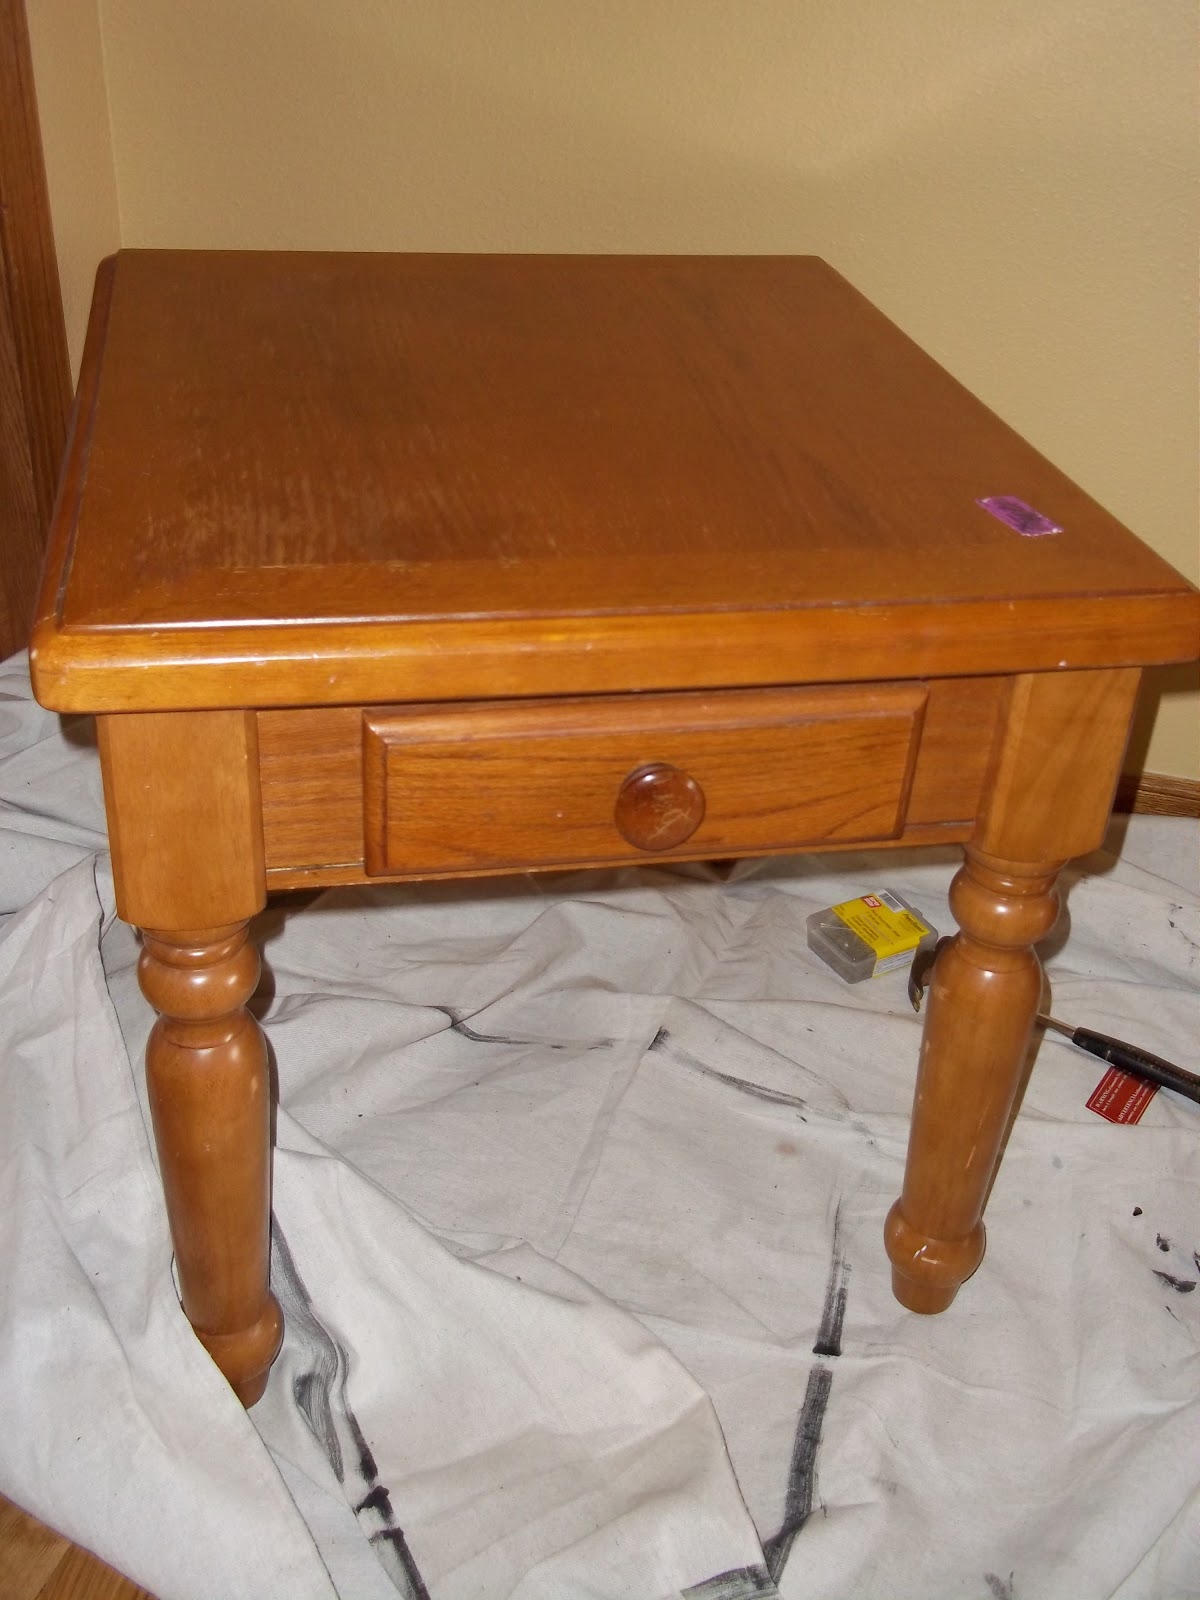
Okay...I know I already posted today but I just had to show you this fabulous antique that I painted for my booth at A & J's. I found it in Denver for a song. It was missing a shelf but other than that, it was in perfect condition!! The carving was beautiful and I had a plan....PAINT IT!! I know some of you are cringing, but decorating is an artform. It is the expression of what human beings find beautiful and my version of this piece at it's best was being painted. It screamed for it!! When I brought it home I realized that it smelled quite a bit like smoke, so I dipped a rag in 1/2 vinegar and 1/2 water and saturated all surfaces and let dry. Then I repeated it twice more. Works like a charm. Here is the before piece...
Bear with me on the photos of this piece. I wanted to show all of the detailing and the photos don't even do it justice.
Basically I put two messy coats of off white Behr paint and primer in one. I picked it up off of the oops rack at Home Depot. Got a quart for $1.00.
Wanted to show you how well that just the first coat covers. It is a great product. This is in a satin finish.

First coat. Look at the detailing already coming out on this piece. I love it! When you are painting an antique, you really just have to jump in! You can't hesitate and overthink it. I gave this piece new life...just watch.

This was with the second coat. I left it messy. I wanted it to have some character. I didn't want it perfect like factory. Older paints performed differently than today's products and I wanted it to look like it came from my Grandmother's house.

This is the corner detailing with the second coat applied. This is how I left it. This is the messy look I was talking about. You can see brush strokes and some of the wood showing through.

I let it dry about 20 minutes. No kidding. This product is very thick and dries so fast. It was even snowing and wet today. This is what the 3X sanding does for the cabinet. One or two swipes and it takes off a generous amount of the paint.
Here are more photos of the detailing with the sanding done.
More of the detailing as I kept sanding. With every time I use the sandpaper I get more confident on a piece so I always have to go back where I started and take off a little more. This was a medium distress. I focused on corners and detailing.

This is how the detailing ended up after two messy coats of paint and the 3X brand sand paper. I love it!

The difference between the distressed side on the RIGHT and the side not yet distressed (LEFT)

This is the distress on the drawer. Look at the corner. I worked from the edges down and across and then just randomly sanded on the drawer's surface.

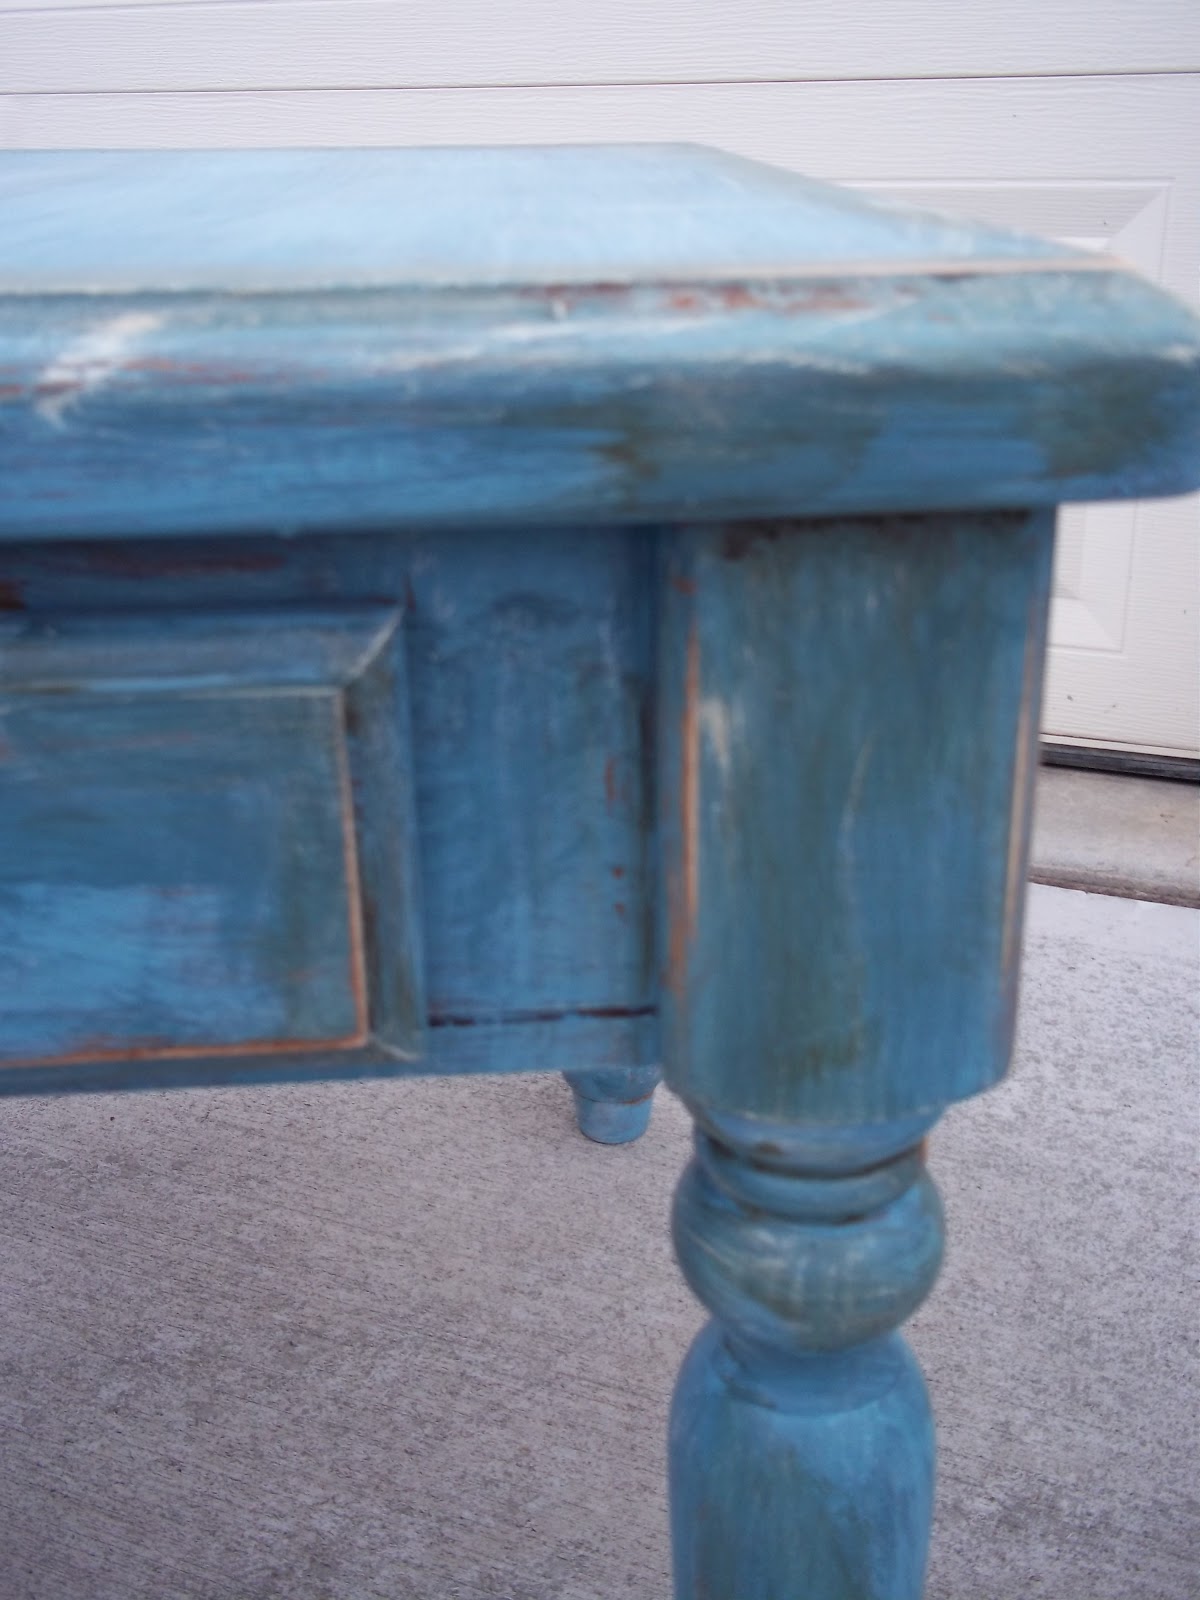
More detailing on the legs. I am sorry for all the pics, but it is important that you see it up close. The far away photos just don't do it justice.

More of the detailing. This is just a medium distress, but the piece could have taken a heavier distress. It had enough lines and character. I just wanted to make it more formal. If a piece is too distressed it turns sort of country. You have to be careful and know how much paint you want to remove before you start.

A closer look at the detailing on the finished piece. I didn't put a satin polycrylic over this because it will allow the piece to grow with use. Every nick and scratch will become a part of the character of the piece.
Another look at the piece from a different angle. I painted the back as well and I distressed the legs and sides to match the front.
This is the after shot of the piece after it was completely finished. I put it in my booth at A & J's this afternoon and it sold in 30 minutes. That really is a record! I didn't even set my purse down when I got home before the phone was ringing and it was Susan at the front desk telling me it had sold.  I had trouble parting with it myself because it turned out so beautiful. This is encouragement for those of you who think you don't like antiques. Look at how wonderful this piece looks and it was a full on antique piece. Take courage and paint! You are honoring the piece by allowing it to have a new look and a new life. Here is another look at the before and after.
I got this piece on craigslist, gave it a new life and now a new home. Happy Thrifting! XOXO the thrift addict.

Hand crafted note cards!

Here is a little project that I have used as a secret weapon for being prepared for years. I keep these little blank note cards around and purchase them in packs of 50 for $3.99 on sale at Hobby Lobby. Then when I have a rainy weekend, I work on them in tens and package them up for gifts. They are great for hostess gifts, teacher gifts, pick me up gifts for a friend, and I have also given them to brides and as get well presents. Just so much fun. Since you use scrapbooking materials and stamps, each one is open for your imagination! I have recently begun making these and packaging them to sell @ http://www.projectyourlove.com/ with all of the proceeds going to relief in Japan. Each packet of notes takes about 30 minutes from start to finish so it is a little time consuming, but for those who are suffering the after effects of the Tsunami, it is time well spent. I am even having a "Love Notes for Japan" party next week and recruiting my friends to help me in this endeavor. I am anxious to see where their creativity takes them. Here is what you do...remember...this is only my version of these notes. The sky is the limit!
First I stamped the front of the plain vanilla colored card with a large "phrase" stamp. It is one of those that you can't really tell what it says but it looks like good wisdom.

Then I stamped the back of the card with this little "reduce recycle reuse" stamp. Makes it look official.

I then cut various scraps of paper in coordinating color scheme and glued them on the front. Here is what it looks like.

I stamped the square with a viney stamp.
Next step was easy. I had some salvaged purple tissue paper from a gift bag and I turned it into a little flower. Just cut a circle about the size of a silver dollar...if you remember what size that is...LOL and then twist the bottom until the "petals" open at one end. I used hot glue to attach it to the paper.


Then I used a little copper stamp to "antique" the edges and front of the paper. I also used this on the envelope which I will give instructions for below.
You can't mess this up. It is a messy technique and you just take the stamp and rub it around edges to give it a nice finished look.

Used the word stamp again and then the viney flower stamp. Used the copper to antique the envelope and then you have a cute matching set.

I also stamped a green vine on the bottom corner of the envelope because I wanted more layers. Here is the set together. So cute and personlized. Now for packaging.
I used a sandwich bag and punched two holes in the top just under the closing seal. I ran a ribbon through the holes and tied it. I usually also have a smaller stamped card with a hole punched in it to attach for the note. Below is a set of personlized cards I did for myself. You can see how easy these are. They are inexpensive, handy and priceless to have around for that situation that comes up unexpectedly. I am sure these are very basic to those of you who stamp and scrapbook. I just wanted to show you that they can be simple. I have used glitter, stickers, photos and lots of other cool items to craft these fun cards. This is a basic breakdown for beginners.

Anyone can do this! These cards are a thrifty decision! Such great little gifts. When you can create 5 sets of cards for $3.99 and some scraps and stamps, you are defnitely being thrifty! I had stamps and scrapbook paper around, but if you have to invest, start small and find your supplies on sale. Michaels and Hobby Lobby are where I shop. They seem to alternate weeks of having scrapbooking supplies on sale.
XOXO...the thrift addict.

Wednesday, April 13, 2011

AMAZING BEFORE AND AFTER TABLE AND WINE CHEST...

I found both of these on a quickie trip to Goodwill yesterday. Each project took me about 2 hours from start to finish. The little wine chest just screamed out to be a tuscan gold with a deep brown glaze and the table wanted to be french country blue. Here is how to do it!
Here is the before. Great bones!  Just a little country in style and dated. The front is real etched glass and the wood is solid. I just had to add some nails to each top corner to stabilize it a little. Took me about 5 minutes.
First step is to tape off the glass front with painter's tape. Then I applied two coats of Deco Art Buttercream paint. You can purchase at any Hobby Lobby. I let coats dry about 45 minutes each.
After the buttercream second coat was dry, I applied a dry brush coat of burnt umber. Remember from past blogs that dry brushing is a technique where you dip a dry brush into paint and then wipe off excess on a canvas or towel and then brush in one direction onto the piece of furniture to create a "used" effect.
In this case, I worked from the outside edges of the piece and concentrated on the corners. You don't wipe off any paint from the piece, you simply keep brushing until it blends and you are out of paint on your brush. You can tell by the photo where the darker brown is that I focused on the edges and then brushed up, down or sideways into the piece.

The finished product!!!! A wine cabinet with a European look! Let's take a look at the before and after once again. Anyone can do this project. Since it is a messy style of finish, you can't mess it up!
I forgot to mention that I picked up this little gem for $8.99! Now it is a one of a kind piece! XOXO the thrift addict!

NOW FOR THE LITTLE TABLE THAT WANTED TO BE FRENCH!!!
I found this little table at Goodwill for $6.99. It was stable and had such beautiful lines that it screamed at me to make it better than before! It wanted to be French! Here is how it went...

First directly on the wood because it is going to be lightly distressed, I applied two coats of Glidden Robin's egg blue. Let dry 30 minutes between coats.
Then as you can see in this photo, I used Americana craft paint in denim blue to stain the edges. I did this by brushing on a watered down version of the paint onto the edges and then taking a towel and rubbing it off after about a minute. I usually call this antiquing. I also did this on the turned legs to make the architecture come out.

Here is how the antiquing with the denim blue looks on the legs. You can tell that it gives the piece some warmth.

The next thing that I did was to add some white paint with a dry brush. I just wanted it to have another layer of "I've been around." It turned out amazing! I concentrated on the corners and on the turn of the legs. You can't mess this step up. It is just for character. If you get too much than you wanted on the piece simply sand it off when you go back to distress it.

The next step was to antique the entire piece with a deep olive stain. I took some Glidden dark olive paint and watered it down into a stain consistency. I brushed it on randomly concentrating on the corners and edges and then wiped it off to my satisfaction. It turns a beautiful patina on this blue color.

Here is how the top of the table looks. You can see the denim and also the olive antique on top and around edges.

Here is a close up of the drawer and the edges after the paint had dried and I had taken 3X sand paper and given it a light distress.

Here is the finished table. It is now a French antiquity!!! Look at those layers and the patina on the new table. It is super cute and all I had to do in addition to painting was tighten one of the front legs. Total project time just over 2.5 hours. Anyone can do this! And remember the price! It was in a thrift store for $6.99...  XOXO the thrift addict.
Another look at the before and after
BEFORE
AFTER! OOH LAH LAH!

Tuesday, April 12, 2011

A sweet re-do on a roll top desk

This little desk was only $10 on craigslist! I didn't even go to purchase it. I found another desk online for $20 and when I got there the guy had me take a look at this one. The rolltop worked great, it was solid although not solid wood and I loved the size. Only 22 inches in width and 36" tall! So cute. I know this is a quickie blog, but since I have explained my techniques in the past...here goes...BEFORE
So cute but had to scrape off stickers and such. Only came with one knob...easy fix.
One coat of Gripper to make the laminate act more like wood to receive the paint.

Coat of black satin paint. Distressed the edges with sand paper to give it some character and added a coat of satin Polycrylic.

Cute knobs and the roll top down and this is the AFTER version of the cute little $10 desk. I put $48 on it for a quick sale in my booth at A & J's . Sold in 24 hours.
This is the sort of project that I love. Bought one day, painted the next, sold the next. It's good to thrift! Happy Thrifting XOXO the thrift addict.

Monday, April 11, 2011

Darling little re-purposed doggie bed

I found this cute little wicker doggie bed at ARC in Loveland. I thought that it would be super cute if I fixed it up for my grand-baby Harlow. She is the cutest little yorkie ever weighing in just under 3 pounds. She thinks she is a pit bull and is very defensive of her mother Hillary. What a cutie. I was lucky enough to find the pillow for it in the pillow section. It had been separated in the store. What a find. The wicker was sort of damaged in the front where the previous furry friend must have used it to chew on. Here is how it went!
Here is that little cupcake. Isn't she adorable????

This is the bed when I brought it home. Not in bad shape at all. Just a little of the wicker is chewed on the front. This is how you fix that. If you have any baskets at home that need it. It is an easy fix.
You can see where the edges just needed a little help.

I found this paper cording stuff at ARC for $3.99 a couple of years ago. It was used for making paper bows when that country look was in. It's peach colored but that doesn't matter on items you are going to fix and then paint. it paints just like wicker.

Use hot glue to glue in pieces you need to fill in and wrap them just as you would wicker.

I made this little name tage after I painted the basket and it was drying. I used an off white spray paint for the basket. Some alphabet stamps, an ivy stamp and some antique rust around the edges on some card stock made this name tag so cute.


I made a little muslin flower (directions on how to do these is in an earlier post) and put it at the top to make it girly for little miss and then after stamping Harlow's name on a cardstock piece, I used packing tape to laminate it, punched a hole on either side with a hole punch and then used some hemp cording to tie it to the basket. I know she is going to love it and Hillary is going to be super surprised. I have two other grand babies...Barkley and Oakley that are going to need some TLC as well, so I will keep looking and see what I can find. I re-did this cute little bed for under $5. Happy Thrifting XOXO the thrift addict.