
I found both of these on a quickie trip to Goodwill yesterday. Each project took me about 2 hours from start to finish. The little wine chest just screamed out to be a tuscan gold with a deep brown glaze and the table wanted to be french country blue. Here is how to do it!

Here is the before. Great bones! Just a little country in style and dated. The front is real etched glass and the wood is solid. I just had to add some nails to each top corner to stabilize it a little. Took me about 5 minutes.

First step is to tape off the glass front with painter's tape. Then I applied two coats of Deco Art Buttercream paint. You can purchase at any Hobby Lobby. I let coats dry about 45 minutes each.

After the buttercream second coat was dry, I applied a dry brush coat of burnt umber. Remember from past blogs that dry brushing is a technique where you dip a dry brush into paint and then wipe off excess on a canvas or towel and then brush in one direction onto the piece of furniture to create a "used" effect.
In this case, I worked from the outside edges of the piece and concentrated on the corners. You don't wipe off any paint from the piece, you simply keep brushing until it blends and you are out of paint on your brush. You can tell by the photo where the darker brown is that I focused on the edges and then brushed up, down or sideways into the piece.

The finished product!!!! A wine cabinet with a European look! Let's take a look at the before and after once again. Anyone can do this project. Since it is a messy style of finish, you can't mess it up!
I forgot to mention that I picked up this little gem for $8.99! Now it is a one of a kind piece! XOXO the thrift addict!
NOW FOR THE LITTLE TABLE THAT WANTED TO BE FRENCH!!!
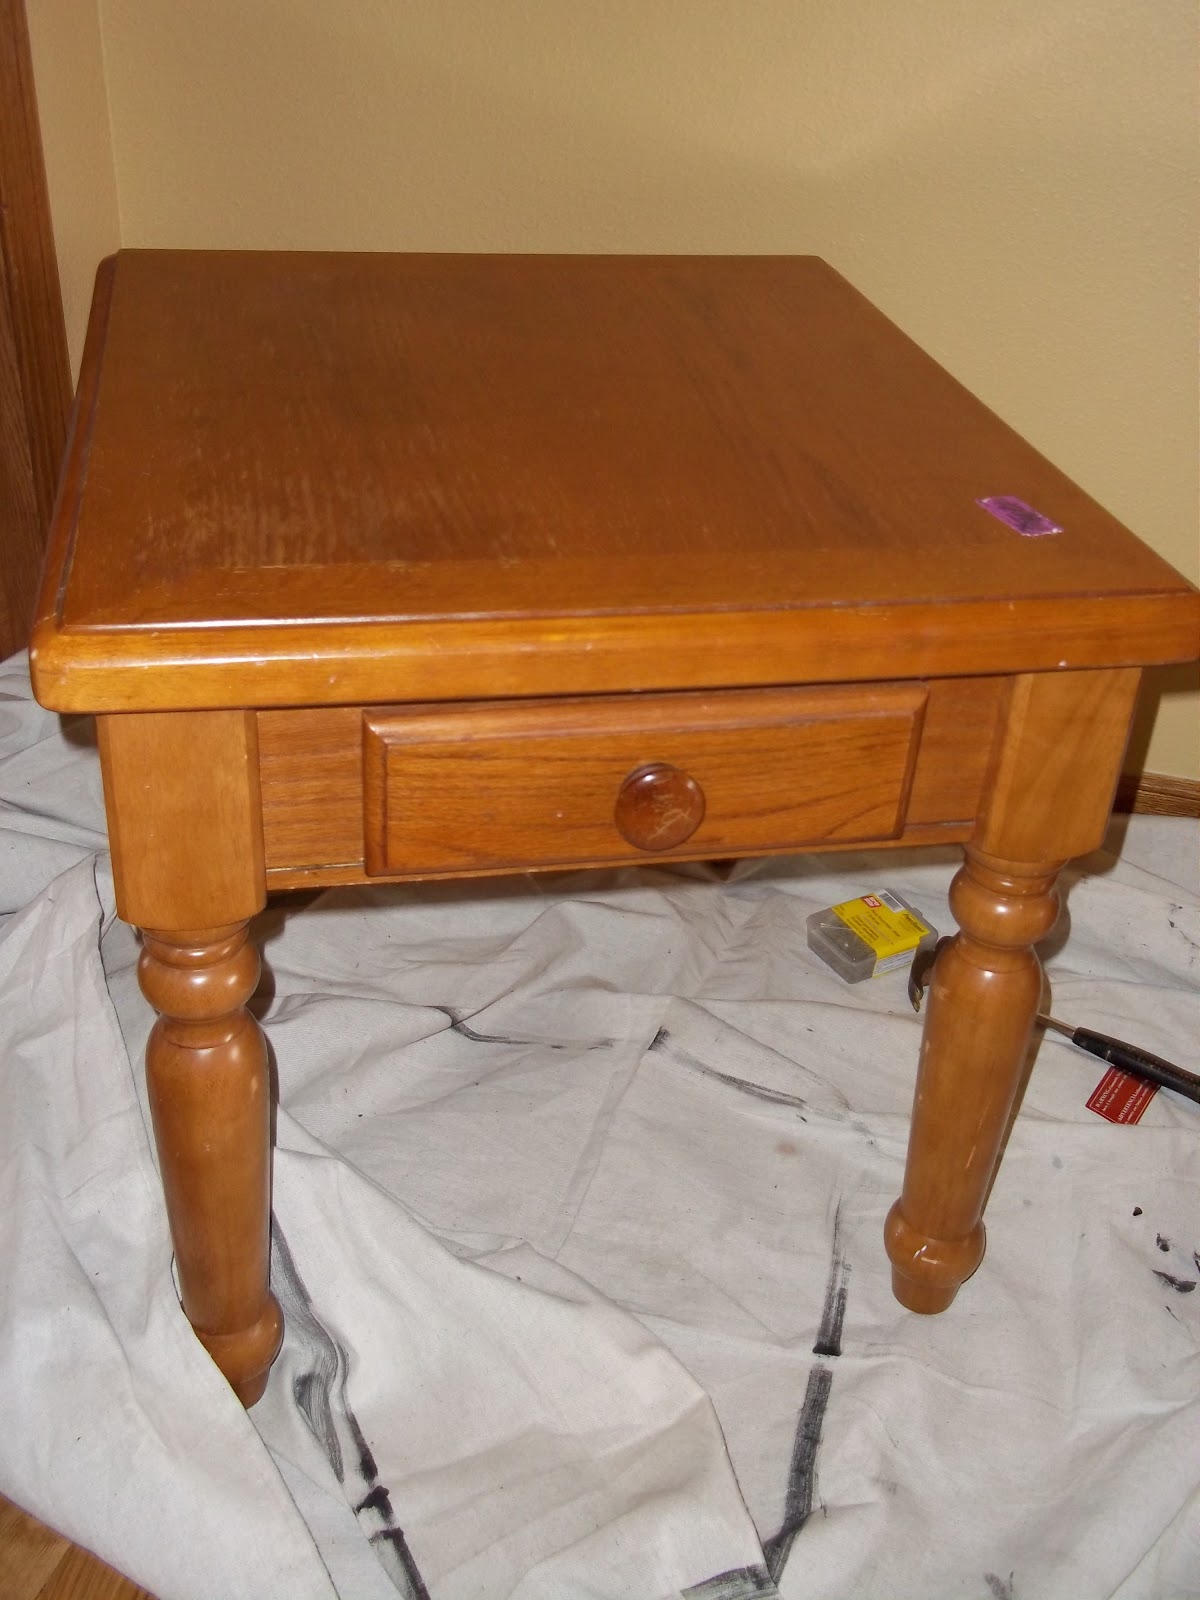
I found this little table at Goodwill for $6.99. It was stable and had such beautiful lines that it screamed at me to make it better than before! It wanted to be French! Here is how it went...

First directly on the wood because it is going to be lightly distressed, I applied two coats of Glidden Robin's egg blue. Let dry 30 minutes between coats.
Then as you can see in this photo, I used Americana craft paint in denim blue to stain the edges. I did this by brushing on a watered down version of the paint onto the edges and then taking a towel and rubbing it off after about a minute. I usually call this antiquing. I also did this on the turned legs to make the architecture come out.

Here is how the antiquing with the denim blue looks on the legs. You can tell that it gives the piece some warmth.

The next thing that I did was to add some white paint with a dry brush. I just wanted it to have another layer of "I've been around." It turned out amazing! I concentrated on the corners and on the turn of the legs. You can't mess this step up. It is just for character. If you get too much than you wanted on the piece simply sand it off when you go back to distress it.

The next step was to antique the entire piece with a deep olive stain. I took some Glidden dark olive paint and watered it down into a stain consistency. I brushed it on randomly concentrating on the corners and edges and then wiped it off to my satisfaction. It turns a beautiful patina on this blue color.

Here is how the top of the table looks. You can see the denim and also the olive antique on top and around edges.
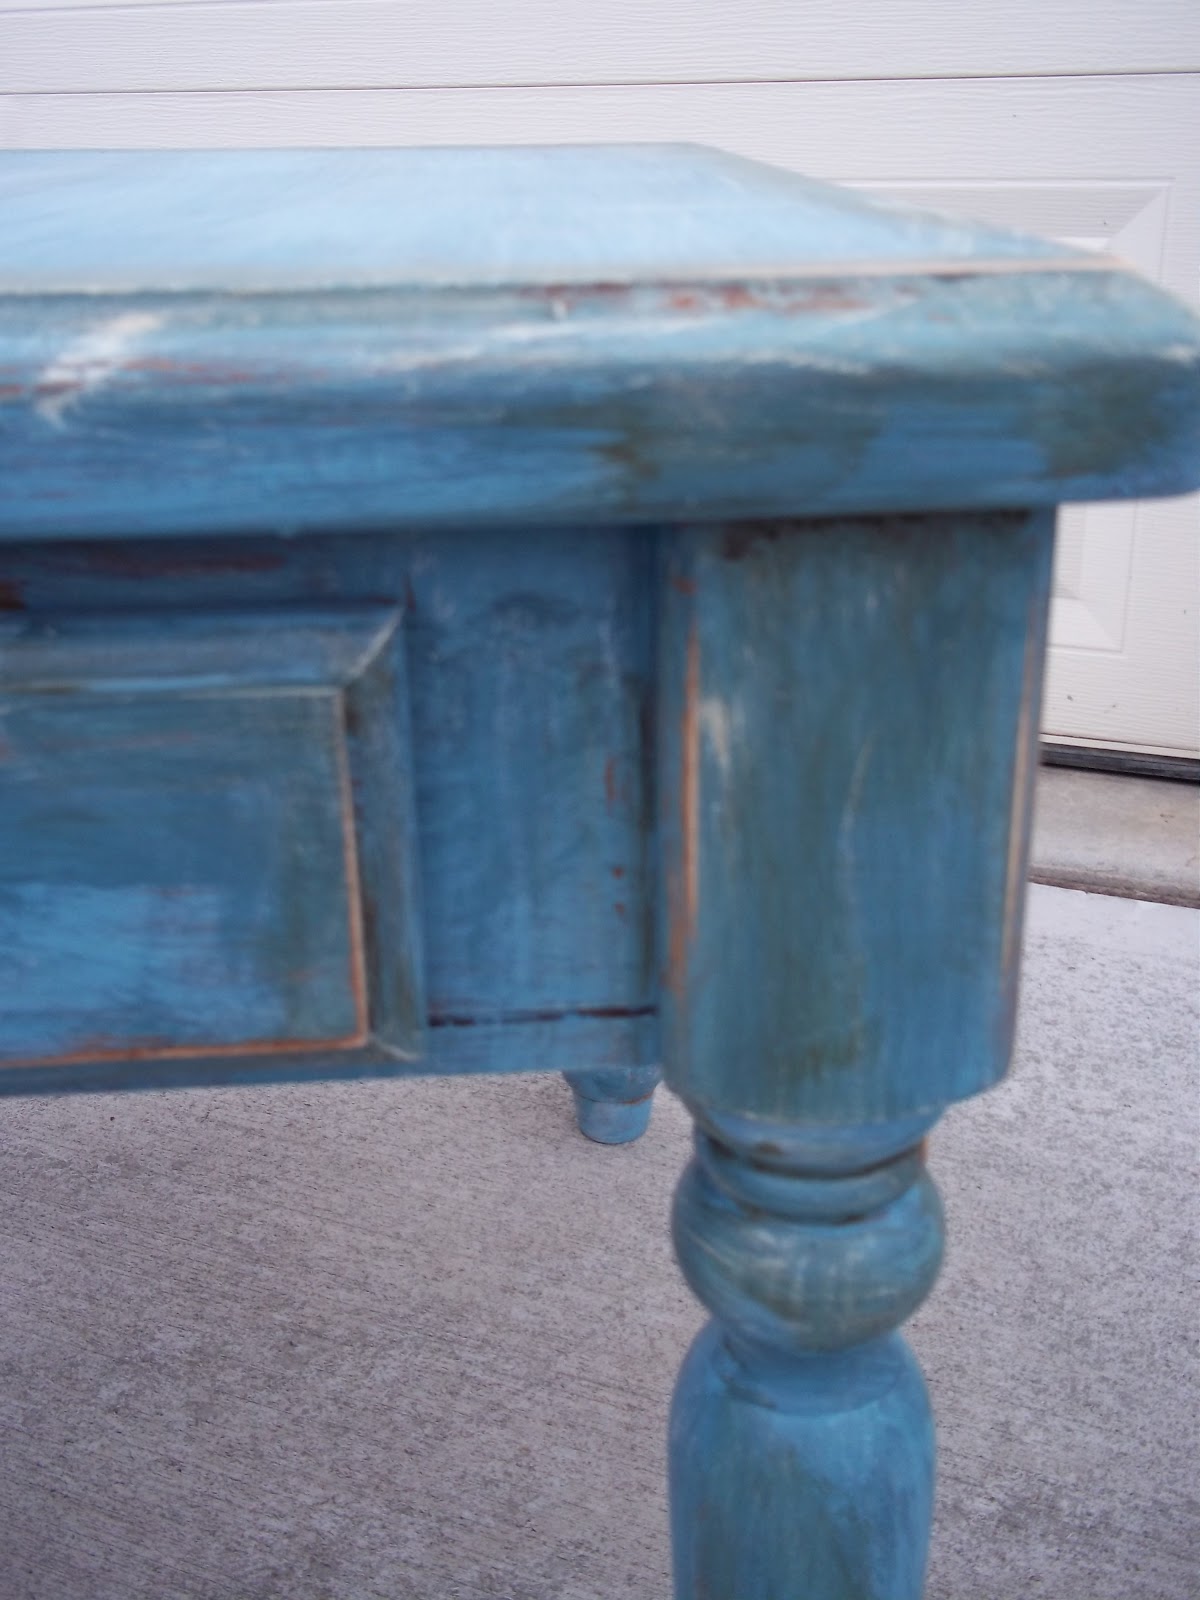
Here is a close up of the drawer and the edges after the paint had dried and I had taken 3X sand paper and given it a light distress.

Here is the finished table. It is now a French antiquity!!! Look at those layers and the patina on the new table. It is super cute and all I had to do in addition to painting was tighten one of the front legs. Total project time just over 2.5 hours. Anyone can do this! And remember the price! It was in a thrift store for $6.99... XOXO the thrift addict.
Another look at the before and after
BEFORE
AFTER! OOH LAH LAH!
No comments:
Post a Comment